How to Build an ATA Road Case
When transporting expensive or delicate equipment, a secure and rugged road case is often the best option. Road cases come in many different shapes, sizes and quality, and offer varying levels of safety. If you plan to ship your equipment on an airplane or require insured shipping, an ATA-rated case is the industry standard. Well,this article will outline the steps necessary to construct an ATA road case.let’s get start!
First of all we have to design the case to meet the equipment’s needs by using a computer or a hand-drawn diagram. This design will help us prepare the parts and materials necessary to build the case.

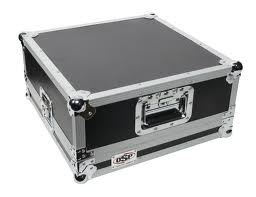
ATA road case
Cut plywood to sizes specified in the design layout. Use the plywood pieces to "dry fit" the design and verify that the sections fit as desired. Make any necessary adjustments before moving to the next step,Cut tapered aluminum edging to fit all edges and corners of the case. Using 1/2" wood screws, assemble the plywood pieces to construct the basic case and lid shapes. Verify that the case is square by measuring the length from corner to corner, diagonally. If the length of both diagonal measurements is the same, the case is square. Install the twist-lock clamp using aluminum rivets as shown in diagram.Install spring-loaded handles using aluminum rivets as desired.Using aluminum rivets, secure aluminum edging to all edges and corners of the case and lid.Attach the ball corners to the outside corners of the case and lid using aluminum rivets.Attach the corner clamps to the corners where the case and lid meet (see diagram). Secure the piano hinge to the case and lid with aluminum rivets. Attach the lid-restrictor strap with aluminum rivets. Using spray adhesive, cut and attach compression foam padding to hold desired equipment. Complete assembly by testing all parts and operation of the case.
Thats how we RK produce the road case if you interested in Road Case or got any problem of ATA road case,contact us now !
First of all we have to design the case to meet the equipment’s needs by using a computer or a hand-drawn diagram. This design will help us prepare the parts and materials necessary to build the case.
ATA road case
Thats how we RK produce the road case if you interested in Road Case or got any problem of ATA road case,contact us now !